TAIKO THUNDER Development Blog — Part 3: Three Play Modes to Improve Your Workflow
This blog post looks at TAIKO THUNDER’s play modes that greatly improve the use and control of the library.
Our last blog post explained how and why we developed the Hitting Position control that reproduces the sound variations caused by hitting the taiko in different positions. It also explored our quest to simplify the user’s control over this function
Our solution was to create three play modes that allow you to interact in different ways with TAIKO THUNDER depending on your workflow. This post describes the differences between the modes and how to use each mode.
Standard Mode
The default Standard Mode lets you play or enter a taiko performance with one or two fingers.
In this mode, just five keys are needed to play the taiko: C3, C#3, D3, D#3, and E3. For taiko instruments, left hand hits are assigned to C3, center hits to D3, and right hand hits to E3. This assignment lets you play on a MIDI keyboard imagining your two index fingers as bachi sticks. (You can, of course, reassign the MIDI notes to your liking.)
The black keys — C#3 and D#3 — are assigned to hits on the left and right rims respectively. Other notes are assigned as articulation key switches as shown in the diagram below. (You generally don’t need the key switches for basic performances.)

There are three options for controlling the hitting position: The modulation wheel, MIDI CC #16 / CC #17 messages, and the pitch bend wheel.
- Mod. Wheel: With the modulation wheel option selected, you can intuitively vary the sound’s tonality in real time, although you can’t control the left and right hitting positions separately.
- CC #16 / CC #17: MIDI CC #16 messages change the right hand hit position and MIDI CC #17 messages change the left hand hit position. This option makes it harder to control the hitting position in real time, but it is convenient to add hitting nuances when entering notes manually because you can control the left and right hitting positions independently.
- Pitch Bend: This option works a bit differently than the others. The right hand hitting position is changed by moving the wheel in the bend up direction, and the left hand hitting position is changed by moving the wheel in the bend down direction. This means you can keep one hand’s hitting position unchanged, and only move the hitting position of the other hand.
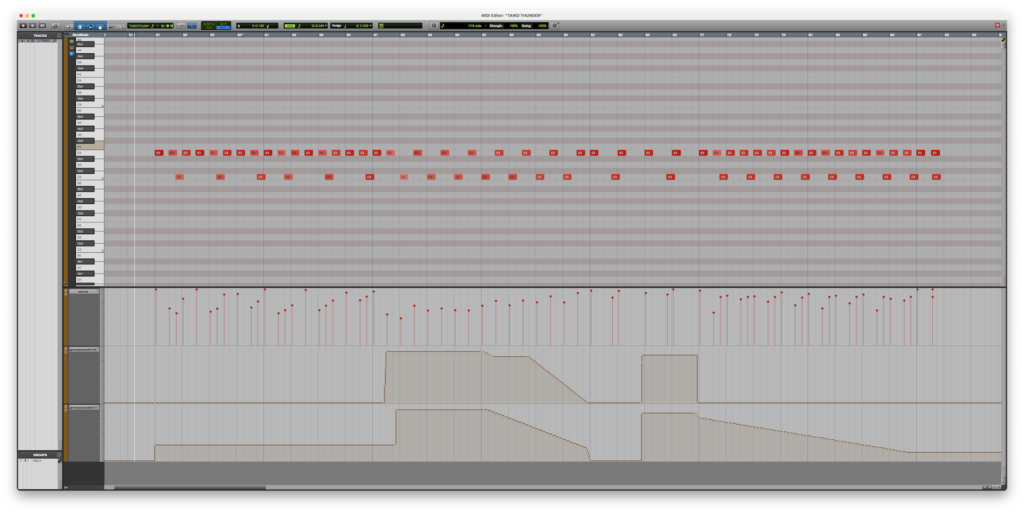
The screenshot below shows the MIDI data for the demo track from the last blog post when entered in Standard Mode.

The MIDI control notes are very simple. MIDI CC #16 and CC #17 are used to vary the left and right hitting positions during the track.
Advanced Mode
The second play mode is the Advanced Mode. Although the Standard Mode is easy to use intuitively, it is hard to know exactly which position you are hitting at any given moment. The Advanced Mode was developed to give much finer control over hitting position data.

In Advanced Mode, every hitting position and every articulation for the instrument are assigned to individual MIDI notes.
If you imagine the MIDI keyboard as a taiko surface, D3 is the center position. C#3 and lower notes are assigned to left hand hitting positions, while D#3 and higher notes are assigned to right hand hitting positions. Normal hits are assigned to the white keys. The farther the note is from D3, the closer the hit is to the rim. Edge hits, tsuke (drag), rim shots, and other special articulations are assigned to black keys following a convention. Once you learn the assignment convention, it is surprisingly easy to play and enter performances in Advanced Mode.
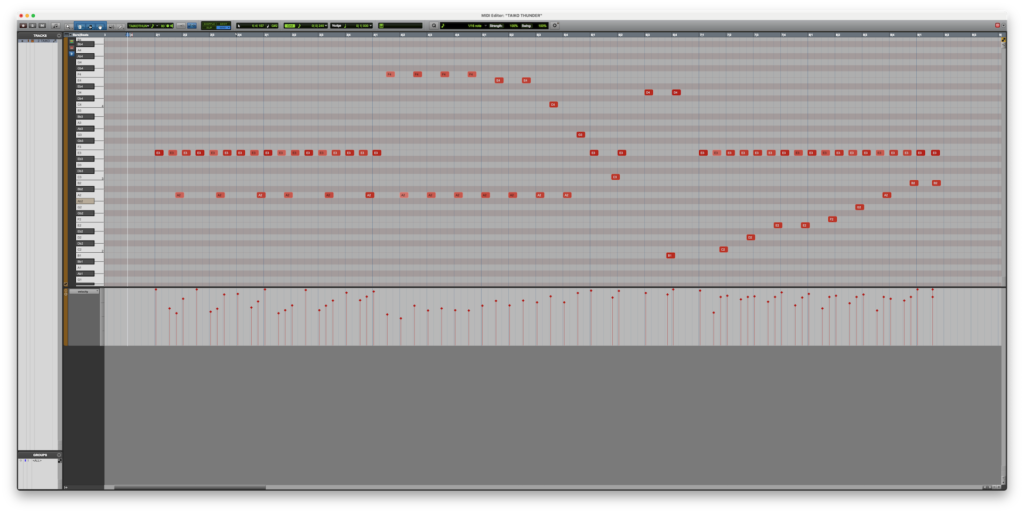
The screenshot below shows the MIDI data for the same demo track entered in Advanced Mode.

The library plays D3 notes as center hits, the higher white notes as right hand hits and the lower white notes as left hand hits. Since no MIDI CC messages are used, this is the best mode for entering hits and hit positions with precision either with a MIDI keyboard or on the piano roll.
Pad Mode
The third play mode is the Pad Mode, which was designed specifically for performances using pad controllers. It was important to us that TAIKO THUNDER could be used for stage performances as well as a KONTAKT plug-in for DAW-based music production. This is why we added the Pad Mode, which customizes the library for use with MIDI pad controllers.
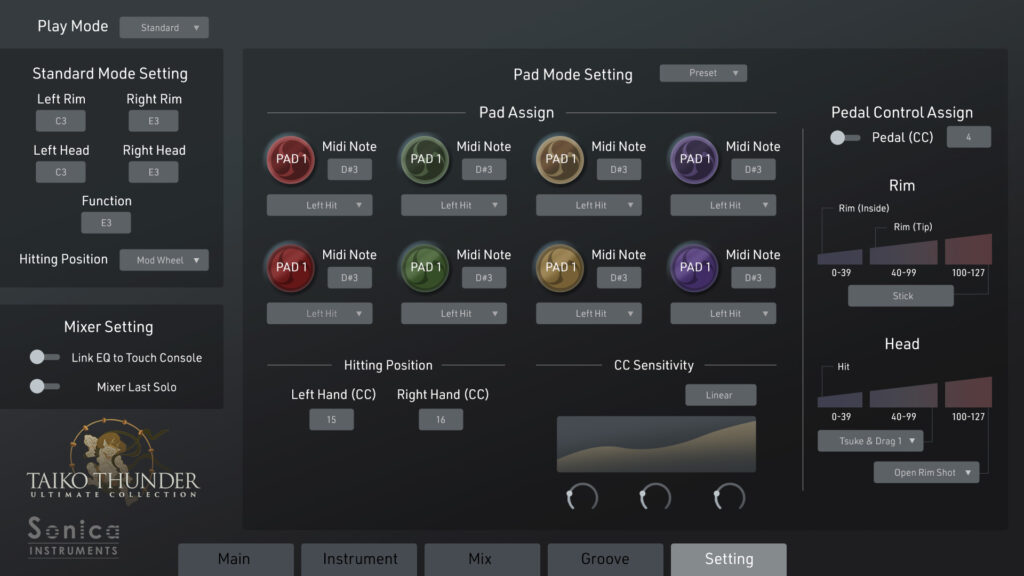
The Pad Mode supports up to eight pads, which can be assigned any articulation. Pads assigned to normal hits can also specify the Hitting Position, separately for left and right, using arbitrary MIDI CC messages. Since you can set the pad assignments to any MIDI note and CC message you like, the library will work with a wide range of MIDI pads, electronic drums, and other controllers.

Please note that as the product is still in development, the UI design and layout in the final official release will differ somewhat from this screenshot.
TAIKO THUNDER has also been designed to take full advantage of the features of Roland’s electronic TAIKO-1 taiko percussion instrument. TAIKO-1 and some other electronic drum models output the pad’s hitting position as MIDI CC messages. Playing one of these devices with TAIKO THUNDER gives you the feel of a genuine taiko.
The Pad Mode also has a velocity curve setting separate from that for the Standard and Advanced modes. This lets users adjust TAIKO THUNDER’s response to best match the characteristics of their MIDI pads.
Our blog posts so far have centered on the library’s taiko instruments. In our next post, we will cover the library’s three metallic percussion instruments: the chappa, the shoko, and the kagurasuzu.
